Remodeling Done Right: What the Process Really Looks Like
- elle2430
- Mar 27
- 3 min read
Remodeling a kitchen might seem simple at first, but there are a lot of steps that go into making sure everything turns out just right. At Denver Flooring & Finishes (DFF), we help trade professionals plan and complete remodels with confidence.
Let’s walk through a real kitchen remodel to show you how the process works. It had a clean design, thoughtful updates, and even a few surprises along the way. Here’s how it all came together:
Step 1: Starting with the Estimate
We always start with an estimate based on the client's initial selections. In this case, the chosen color looked good on paper, but once the homeowner saw the actual slab at our supplier, they realized it wasn’t the right fit.
We went back to the drawing board and picked a new color that better matched the home’s style. This is why we always recommend seeing materials in person when you can.
Step 2: Making Design Decisions
The homeowner had been looking at a lot of inspiration photos on Houzz and Pinterest. One popular look right now is a full slab backsplash. It’s beautiful, but it also adds a lot of cost.
In this kitchen, the backsplash wall had windows, and using a full slab would have made the windows look smaller and deeper. After talking it through, we helped them pick a tile that will look amazing and works better with the space.
Step 3: When Plans Change
It’s totally normal for projects to shift a little. This homeowner decided to replace their cooktop at the same time, which led to a bigger change. The new appliance needed a 220v electric hookup instead of the gas they had before.
We worked with their team to make sure the electrical was updated so everything would run smoothly.
Step 4: Custom Template Time
The homeowner is an engineer and wanted to tweak the layout of the peninsula. Instead of keeping the angled edge, he made a plywood template to create a rounded shape.
This small change gave them more counter space and better legroom for the bar stools. It’s a great example of how even small adjustments can make a big difference.
Step 5: Demo Day
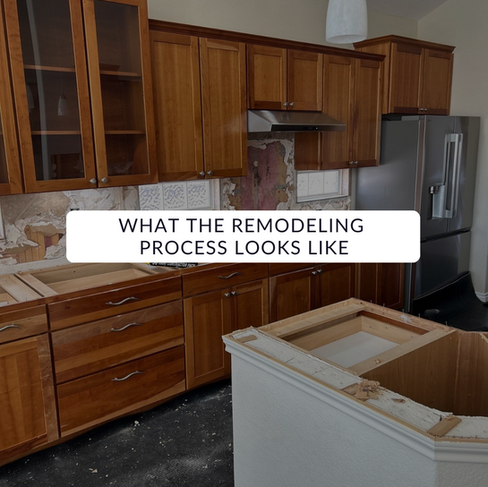
Before the new countertops could go in, we had to remove the old materials. That meant getting rid of plumbing fixtures, tile, and drywall. To protect the floors, we laid down foam padding before starting the demo.
Step 6: First Surprise
When we took down a cast iron pan from the wall, we noticed something interesting. The cherry cabinets had faded around it from sunlight over the years. You could see the shape of the pan on the cabinet surface. This kind of aging, or “ambering,” is common with cherry wood in bright rooms.

Step 7: Second Surprise
Another unexpected detail was the countertop thickness. Tile countertops are usually thicker than slab ones. After removing the old tile, we saw that the cabinet panels had aged in the areas the tile used to cover. This left a visible color change where the old counters had been.
Step 8: Installing the New Countertops
The radius peninsula and sink cutout needed extra support. We provided sturdy brackets to hold everything in place. We also used epoxy to connect the seams and to secure the sink.

Step 9: Letting It Set
The epoxy needs a full 24 hours to cure before we can install the faucet and reconnect the plumbing. Waiting that extra day helps keep everything secure long-term.
Step 10: Finishing with the Tile Backsplash
The tile backsplash was the last step. It tied the whole design together and added just the right amount of texture to the kitchen. The final result looked clean, modern, and fresh.
What We Learned (and What You Should Know)
Remodeling isn’t always straightforward, and that’s okay. Changes happen. Surprises pop up. But with the right team and the right plan, everything comes together.
At Denver Flooring & Finishes, we help our clients think ahead, stay flexible, and make smart decisions every step of the way. We’re here to make the remodel process feel less stressful and more exciting.
Thinking about starting a remodel? Let’s talk about how we can help make your space work better for you.
Denver Flooring and Finishing


Comments